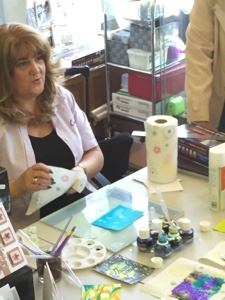
AquaTint's introduction with Dawn Macfie.
We was lucky enough to have the very talented Dawn Macfie from Crafter's Companion join us on Saturday to give us an introduction into the world of Aquatints.
As you can Imagine, there is so much that they can do, much more that can be possibly shown on one blog post, so we shall get started with some tips and tricks
Background 2
The tints make great background for the create a card dies.
As you can Imagine, there is so much that they can do, much more that can be possibly shown on one blog post, so we shall get started with some tips and tricks
Background 1
Use a few droplets of AquaTints on Sheena card stock. Sprinkle with sea salt and leave until dry.
Apply a few drops of your chosen colours. Crumple up some cling film, and then open up and apply to the card. Leave to dry. When the card is dry you can reuse the cling film again and again.
Background 3
Apply some shaving foam to a glass mat or a non-stick craft mat. Smooth off with a ruler but try not to flatten the foam to much. Gently trace a pattern merging the colours together, and place the card stock on top of the foam. You can generally get about 3 cards from the one application of foam.
Background 4
Use as brush to create a wash over the card stock. You can blend colours together to create scenes or you can splash/stamp the card stock with water then pat with kitchen towel to create a bleach effect.
Stamp using archival ink pad or stazon to ensure the inks don’t bleed together.
The Sheena Douglass Victorian floral dies and corresponding stamps work perfectly with the Aqua Tints.
There are 6 sets in the Spectrum Noir AquaTints RRP £24.99
Perfectly Primary, Beautifully Grunge, Landscape, Essentials, Pretty Pastels &Bright and Beautiful. Each set contain’s 6 pots of AquaTint inks, 6 pipettes and 3 brushes.
The essentials kit contains: silver and gold pearl, which can add a pearlescent tint to any colour. White and Black which can lighten and darken any shade.
Thanks for looking,
Jody x


